Vinyl floors are the first choice for many homeowners. These floors are relatively resilient and durable, available in all colors and patterns, and the installation process is not too complicated. In this article, we go over how to install vinyl plank flooring as a beginner.
To install vinyl plank flooring as a beginner, you will have to choose the floor type, gather necessary tools, prepare the floor for installation, and plan the installation according to room size and shape. The last step is to install the floor.
As we all know, proper preparation is the key to success, and if you do it right, your floors are going to look great.
Choose the Vinyl Floor Type
Typically, the first thing you think of when choosing vinyl plank floors is the colors and patterns. You want to make sure it matches or complements your existing furniture and home decor. As important as that is, when it comes to installation, there are other selections you need to think of first.
There are three types of vinyl plank flooring, and the main difference is their installation process.
===>You may also be interested in the overall advantages and disadvantages of vinyl flooring.
Interlocking Vinyl Plank

Interlocking type of vinyl plank flooring is similar to some types of laminate. To connect the pieces together and install them, you don’t need glue or any other adhesive. These floors are connected in a way that they “click” together.
All the pieces have joints that click together and form a firm and reliable connection, sort of like a jigsaw puzzle. This type is easy to install and won’t make a big mess.
As with the next type, the vinyl plank does not have adhesive to be affixed to the subfloor.
Grip Strip Vinyl Plank
This type of vinyl plank floor has adhesive material already on them, applied by the manufacturer to connect the pieces together. However, the vinyl plank is not “glued” to the subfloor.
When you install grip strip vinyl plank, you have to be careful and precise; otherwise, you may end up with a “floating” floor. If the connected pieces are forcefully pressed together, and their size is slightly larger than the room size, the floor could lift up in the middle, and you will end up with bumps and uneven surfaces.
The good news is that you may install them over your existing floor just like with the interlocking type because they are not connected to the subfloor.
Glue Down Vinyl Plank
And the last option is the adhesive type. Unlike the previous two, these are connected to the subfloor with glue. Glue can either be applied to the bottom of the vinyl plank by the manufacturer, and you just have to install it, or you will have to apply glue to the floor and install the vinyl plank on top of it.
This last option can be a bit messy and harder to install. The main issue with the glue down option is that there is no going back after you glue it. If you did something wrong, it is hard to make changes.
Gather the Necessary Tools
There are some basic tools you are going to need, along with some more advanced ones.
You will have to get a measuring tape, a pencil or marker, and a straightedge among basic tools.
To cut the vinyl plank, it would be good to have a specialized cutter. These are going to do the best job. However, its price is quite high. Alternatively, you can use a sharp knife to make a cut and snap it.
A miter saw can come in handy for more challenging parts. Always use gloves and protective gear when using these tools.
Prepare the Floor for Installation
Now that you have everything, it is time to prepare the floor for vinyl plank installation.
Make precise measurements to ensure you buy the correct vinyl plank quantity. You should always buy at least 10% more because you will have to cut certain pieces, and the extra parts will not be usable. It is always better to have a bit more.
Clean the floor, fix any cracks, and make sure there are no humid or moldy parts. The floor has to be leveled. If there is carpet or similar flooring already installed, you probably will have to remove it.
Plan the Installation
Now, it is time for the most important part. Before you start installing the vinyl plank, make sure you have a plan on how to do it.
Measure the room and size of the planks. Divide these numbers to see how many planks you need to cover the width of a room. Cut the edge planks accordingly.
Start along the edges, never from the middle. Apply whole planks along the visible edges, and finish with cut ones along those edges where the furniture will be. That way, you will hide the cut parts for a better appearance.
Read the manufacturer’s instructions to determine how much space you need to leave between the floor and the wall. If you have to install planks around some obstacles, draw the obstacle on paper, then transfer it to the plank and cut it.
Install Vinyl Plank
Finally, the floor is ready to be installed. Depending on the vinyl floor type, there are different instructions to follow.
Interlocking Vinyl Plank
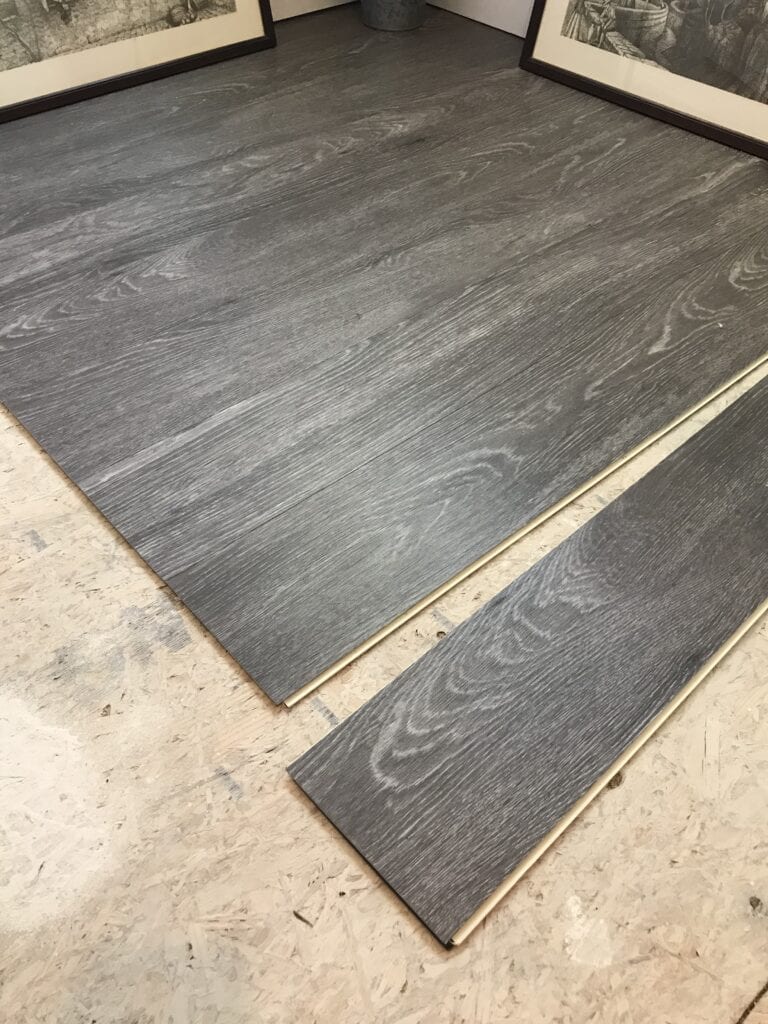
First, you have to remove the interlocking edge of the first plank. Place this plank next to the wall at a proper distance. Attach the second plank by clicking them together.
You will find the exact instructions in the manufacturer’s instructions. Fill the entire row.
Start adding the second row. Here you have to attach planks and to those on the side (first row). Keep doing it until you fill-up the entire room. And you are done! Easy, right? Even for a beginner!
This is a video demonstrating how to install interlocking vinyl plank as a beginner. The installation is for a laundry room, but the principles apply the same for any room.
Grip Strip Vinyl Plank
Install the first row next to the wall and leave a prescribed space between the planks and the wall. Pull them close to overlap the strips with adhesive, and press them down.
Continue to fill up the room, row by row, and make sure you press them all firmly. When you are done, use a roller to press down the whole floor even more.
In this video below, William B Tedrick takes us to his house and shows us how to install a grip strip vinyl plank.
Glue Down Vinyl Plank
Precise measurements are crucial here. Apply the glue on the floor, work section by section. It has to be evenly distributed.
Place the plank onto the floor. Press it. Then start adding one by one until you finish the desired area. Make sure you follow the manufacturer’s instructions for the use of glue. For this method, avoid doing row by row, and instead, divide the room into quadrants, and fill up one by one.
If the glue ends up on top of the plank, immediately wipe it off.
The following video from Tech Hobbies shows us how to install plank vinyl on glue. They tried to keep everything as simple and easy as possible, but bear in mind that this is the most complicated of the 3 methods.
And that is it! Installing vinyl plank flooring as a beginner can be done, and the result may surprise you!
Related Posts:


